Monday, March 19, 2012

Cauliflower pizza

I have had this head of cauliflower sitting in my fridge, just going to waste. So, I finally decided to use a recipe I had found for cauliflower pizza crust. It was a little confusing because this website doesn't really go into detail on how things should look...now that I think of it, I might just be one of those people that need to have step by step pictures. Either way these babies turned out wonderfully. I would say the first time making these is a bit time consuming... but now that I've done it, it will be a lot faster.
 I was a bit worried, and skeptical, about the turn out of the crust and if this crumbly weird "dough" would all stick together. And it turns out that it did! So if things look a little weird, don't worry its totally normal!

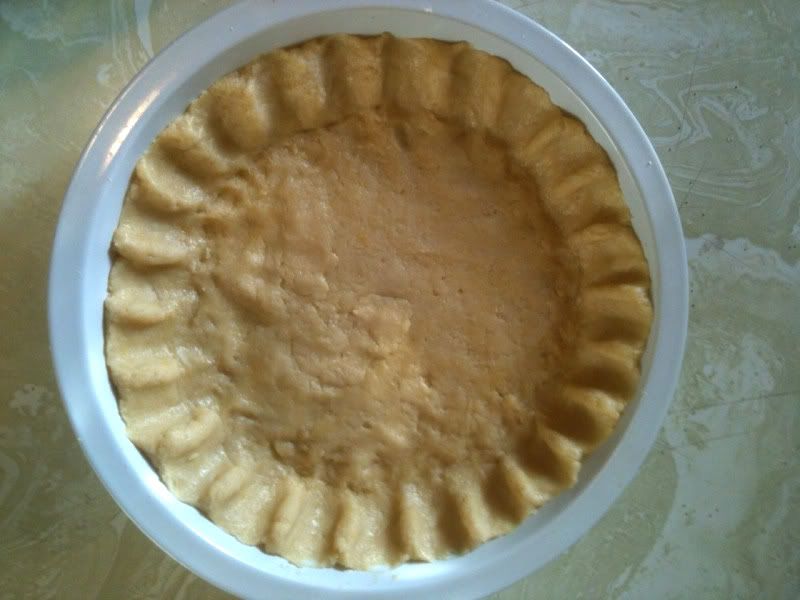
Also I didn't take any photos of the crust prep!!!! i was way too stressed about these things not turning out! But here some of the after.

Recipe:
1 cup cooked, riced cauliflower
1 cup shredded mozzarella cheese- I only had a bag of pre shredded Italian cheese blend and it worked just fine.1 egg, beaten- I didn't beat my egg before I just tossed it in a mixed it with the cheese.1 tsp dried oregano- I also added pepper, fennel, and Italian seasoning1/2 tsp crushed garlic- didn't have a garlic crusher so I minced mine. Strong garlic taste and a bit garlic odor after, but it's worth it1/2 tsp garlic salt
olive oil (optional)- didn't do this.. i dont think it needs it.

Directions:

To "Rice" the Cauliflower:
Take 1 large head of fresh cauliflower, remove stems and leaves, and chop the florets into chunks. Add to food processor and pulse until it looks like grain. Do not over-do pulse or you will puree it. (If you don't have a food processor, you can grate the whole head with a cheese grater). Place the riced cauliflower into a microwave safe bowl and microwave for 8 minutes. There is no need to add water, as the natural moisture in the cauliflower is enough to cook itself.

One large head should produce approximately 3 cups of riced cauliflower. The remainder can be used to make additional pizza crusts immediately, or can be stored in the refrigerator for up to one week.
To Make the Pizza Crust:
Preheat oven to 450 degrees. Spray a cookie sheet with non-stick cooking spray.
In a medium bowl, stir together 1 cup cauliflower, egg and mozzarella. Add oregano, crushed garlic and garlic salt, stir. Transfer to the cookie sheet, and using your hands, pat out into a 9" round. Optional: Brush olive oil over top of mixture to help with browning.
Bake at 450 degrees for 15 minutes.
Remove from oven. To the crust, add sauce, toppings and cheese. Place under a broiler at high heat just until cheese is melted (approximately 3-4 minutes).
Enjoy!
*Note that toppings need to be precooked since you are only broiling for a few minutes.

I made sauce from a jar of marinara from trader joes with some tomatoe paste added to thicken things up.


-M

Friday, March 16, 2012

Coffee Cake


OH MY GOSH! This coffee cake WAS seriously amazing... yes it's true I already ate all of it even though I made it two days ago! To be fair I did give half to my friend... so it's ok right?
I love this cake and I had MOST of the ingredients already on hand. I didn't have cake flour, i think most people don't have this on hand. I found this link that gave me an alternative to using cake flour. Who knew that corn starch could solve all your problems! I also didn't have kosher salt, i actually Googled why I should use kosher salt instead of good'ole table salt. I found out that kosher salt for baking just gives whatever you're using it for a little bit more of that salty taste. I didn't find that to be very convincing and i didn't want to buy the $5 bottle of salt.... BUT... I am really really trying to follow recipes to the T. Then I  really know if it's a bad recipe or a good one. So, I bought the kosher salt.
Then a friend of mine wanted to bake it together... which baking with a friend is literally one of the best things. Not only do you get to be with someone else, the work is so fast! We made all this with in 20 minutes. And got to chat while the cake baked.

Ok so here it is I really really recommend it. One thing that I would advise, since it's been a few days for me, would be to make sure you cover this really well or else it gets DRY fast.

Ingredience

we bake in chaos

forcing caitlin to use my crazy hand mixer... this thing is so fast and scary.

shes pretty

one layer of strussel
Fresh out of the oven... yum

after being shared and glazed


Cake:
12 tablespoons (1 1/2 sticks) unsalted butter, room temperature
1 1/2 cups sugar
3 large eggs, room temperature
1 1/2 teaspoons vanilla extract
1 1/4 cups plain Greek yogurt (I always have
this one in my fridge)
2 1/2 cups cake flour (not self-rising)
2 teaspoons baking powder
1/2 teaspoon baking soda
1/2 teaspoon kosher salt


Streusel:
1/2 cup all-purpose flour
1/4 cup light brown sugar
1 1/2 teaspoons ground cinnamon
1/4 teaspoon kosher salt
3 tablespoons unsalted butter, cold and cubed


Glaze:
1 oz cream cheese, softened
1/2 cup confectioners sugar
2 to 3 teaspoons milk
1/2 teaspoon vanilla extract


Preheat the oven to 350 degrees and grease and flour a 10-inch tube pan.


In an electric mixer fitted with the paddle attachment, mix the butter and sugar for 4 to 5 minutes, until light and fluffy. Add the eggs to the butter-sugar mixture 1 at a time, and then add the vanilla and yogurt. In a medium bowl, sift together the flour, baking powder, baking soda, and salt. Add the dry ingredients to the batter and mix until just combined. Scrape down the bowl with a rubber spatula to make sure everything is combined.


Make the streusel by combining the flour, sugar, cinnamon, salt, and butter in a small bowl. Rub the butter into the dry ingredients with your fingertips until there are large crumbs throughout.
Spoon half of the batter into the prepared tube pan. The mixture will be thick so distribute and smooth out the top of the batter with a knife (an offset palette knife works best). Then scatter 3/4 cup of streusel on top. Spoon the rest of the batter on top, smooth the top, and sprinkle the top with the remaining streusel. Bake for 50 to 60 minutes, until a cake tester comes out clean.


Cool on a wire rack for at least 30 minutes. Once cooled, carefully remove the cake form the tube pan and transfer to a serving plate or cake stand of your choice. Whisk together the cream cheese, confectioners sugar, milk (starting with 2 teaspoons and adding more if needed), and vanilla to make the glaze, it should be thin enough to drizzle but not too watery. Drizzle the glaze over the coffeecake with a spoon.


-M

Tuesday, March 13, 2012

UPDATE on lemon tart

Ok, so this recipe is definitely worth the effort and time! And if you were to make your crust ahead of time then it would be even easier! The taste of this tart came out even better than I had hoped. I even brought some for the ladies in my office and got some good reviews. One thing I wished is that mine was prettier... it came out pretty ugly. But who cares? This thing tastes like heaven!

my crust in my pie pan.


my tart... I already ate some and it was night time so it's dark.


it might be U-G-L-Y but it is soooooo good!


give this one a shot, you will not be disappointed!

-M

Sunday, March 11, 2012

Lemon Tart

what the tart is supposed to look like (image from whisksandwhimsy)

I took a stab at a tart today. I guess you could call it a tart, even though i didn't use a tart pan (i don't have one but i improvised and used a glass 1in deep pie pan). This recipe seemed simple enough and I was once again gifted a bunch of Meyer lemons. (They are now my new favorite thing for everything! sweet and tangy you can't go wrong) So I had told my co-worker that gave me lemons that I would try this tart. So I am.
I'm not going to say this tart was easy to make, but it also wasn't hard. The fact is that it is time consuming, which i really don't mind usually, but today i was annoyed by it.
Any way my tart is cooling so pictures will follow and i ran into a problem with the filling not hardening. I actually wrote the woman at whisksandwhimsy to see if this might be normal. So as soon as I know you should know. The recipe is really simple to follow and i think had I actually used all the materials I was supposed to then I wouldn't have had any problems. 


Crust:
1 1/2 cups flour, plus more for dusting
1/4 cup sugar
pinch of salt
1/2 cup unsalted butter, cut into cubes, room temperature
1 egg
Filling:
Zest of 2 lemons
3/4 cup fresh squeezed lemon juice (about 3-4 lemons)
3/4 cup sugar
1 egg, plus 1 yolk
3 tablespoons melted unsalted butter
Garnish:
6 ounces fresh raspberries
2 teaspoons sugar
Powered sugar for dusting

happy baking
-M

Tuesday, March 6, 2012

FOOD!

If only you could taste this picture... you would DIE! El Rose Panderia is to die for. Tamales, cookies, Pan dulce, candy, everything!

Homemade Acai Bowl... not as good as Cafe Brazil in Santa Cruz, but on a budget it will do.

Even though I sometimes hate how hip and trendy Verve Coffee Roasters is they do make a mean hot chocolate! YUM

Burger and fries from paradise beach grille in Capitola. I'm not a big fan of this place but the food is really good... so I'll deal with all the drunk, snooty people that dine there.

Fondue

If you want to have a heart attack while simultaneously eating one of the best things you have ever tasted, order this from Paradise grille. A cheese cake, rapped in puff pastry, covered in hot caramel, with vanilla bean ice-cream, and fried bananas.... yea

As you can probably tell lately I have been consuming tons of food.... It may seem a little gluttonous, but I promise it's totally under control ( I think ). I have been on a roll making things from scratch as well as just going out. I have become really good at procrastinating on my homework...."Well I'm hungry, and how can I possibly think of doing any work if I don't have a full stomach. Guess I have to make a home made pizza and wait for the dough to rise, OH WELL"  (one of many thought processes I have had)

I thought it might be fun to share with you some of the things I have either purchases or made myself. All of them are worth trying, and if you like it then it's really a win win scenario at that point.

From lovin in the oven I found an amazing Monster Marshmallow Cookie recipe, that I just so happen to have all the ingredients for. Well to be fair Colman's family had all the ingredients and in a failed attempt to wake him from his 3 HOUR  NAP! I started bakin' up these bad boys. These were really quick, and the only "problems" I ran into was when I tried to push the minnie marshmallows into the dough. It just didn't work, so I kinda pushed them in then covered them with more dough. I am also not really big on how something looks, I'm more about the taste. These defiantly won me over I will make them again

I halved the recipe because 4 dozen is just way too many for Sam and I, but I will put the link for the full recipe on here as well. I also didn't use white chocolate chips because I think they are disgusting (and I didn't have any) but mostly because they are gross.

1/4 Teaspoon Baking powder
1/2 Teaspoon Baking Soda
Pinch of salt (I didn't add this)
1 Stick unsalted butter (8TBS), softened
1/2 cup granulated sugar
1/2 packed brown sugar
1 egg at room temp
1 Teaspoon vanilla extract (the original calls for more)
1/4 cup peanut butter (I added a tad more for more of a peanut butter taste)
1 cup quick-cooking oats
1 cup chocolate chips
minnie marshmallows

1 cup all-purpose flour
Preheat oven to 350 

Stir together: Flour, Baking powder, Baking soda in a large bowl
Cream butter and Sugars until fluffy, Beat in egg, then add vanilla
Add peanut butter and mix until smooth.
Mix in flour mixture until just combined.
Stir in oats and chips with a wooden spoon.
Drop the dough by heaping tablespoons onto baking sheet, then push in 4-5 marshmallows (or in my case don't)
Bake for about 10-12 minutes depending on your oven it could be more or less.


Next thing I made recently was a pizza and calzone. Both of which were so good, but it is pizza so you can't really go wrong. Having to make dough, and deal with yeast has been the reason why I haven't made homemade pizzas yet. I stumbled upon the cooking blog simplyscratch and it changed my view on pizza making all together. She makes it so understandable and easy to make bread type things. I followed her recipe for homemade calzones but made a pizza dough out of half instead of two calzones. It worked out just fine too, so I'm basically a winner. Sam loved the pizza and I loved the calzone and the pizza!


Hope you weren't hungry

-M